Table of Contents
The Antminer S19j Pro is one of the most reliable and popular models in Bitmain’s 19 series. Known for its efficiency and stability, it remains a staple in many mining farms. Before diving into the technical repair and voltage diagnostics, it is essential to understand the basic hardware specifications of this model to ensure you are using the correct firmware and power settings.
Antminer S19j Pro Technical Specifications
| Feature | Specification |
| Release Date | July 2021 |
| Default Hashrate | 96 TH/s – 104 TH/s (Typical) |
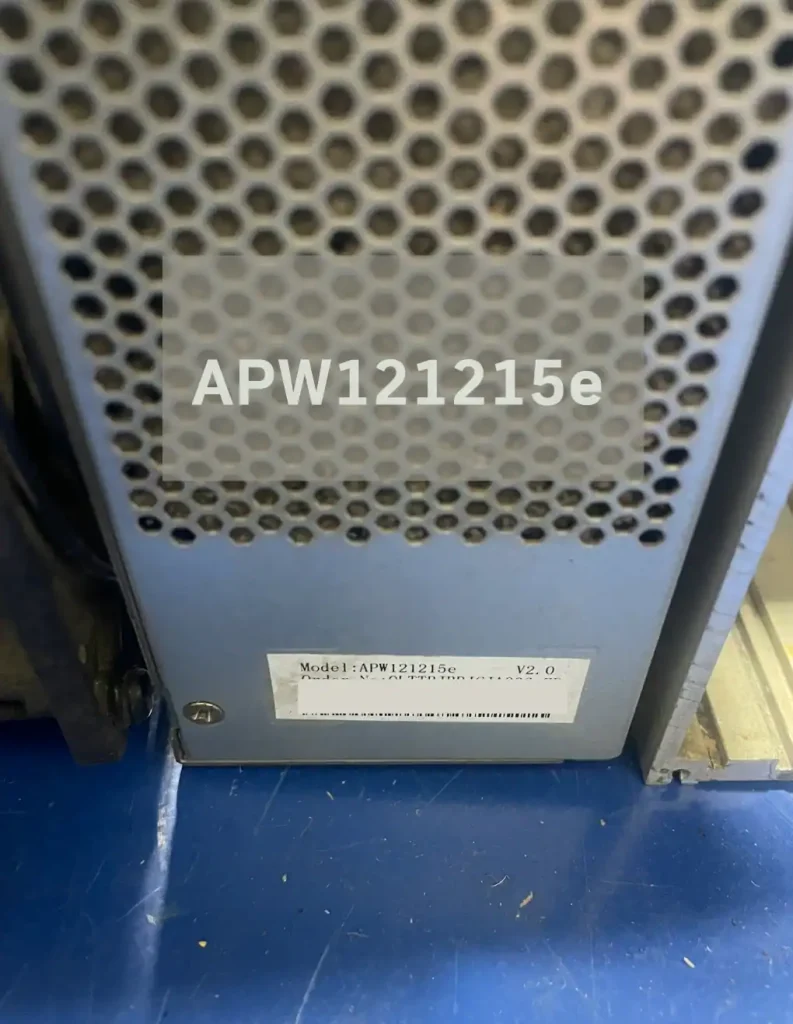
| PSU | APW121215e |
| Power Consumption | 3060W – 3328W (±5%) |
| Power Efficiency | 31.5 J/TH – 32.5 J/TH |
| Chip Type | BM1362 (Custom 7nm ASIC) |
| Number of Hashboards | 3 Boards |
| HASHBOARD MODEL | BHB42631, BHB42621, BHB42601, BHB42603, BHB42651 |
| Cooling | 4 x 12038 High-speed fans |
| Network Connection | RJ45 Ethernet 10/100M |
Antminer S19j Pro Hashboard Variations
The Antminer S19j Pro is known for having several hashboard iterations. While they may look similar at first glance, understanding the specific model numbers and their physical builds is crucial for successful repair or part replacement. Mixing incompatible boards can lead to shell fitment issues or system communication errors.
Common Hashboard Models for S19j Pro
Depending on the production batch, you will likely encounter one of the following five hashboard models:
- BHB42601 / BHB42621 / BHB42641: The standard hashboard versions found in most regular S19j Pro units.
- BHB42603 (noPIC): A special variation used in “noPIC” batches. This board lacks the PIC chip usually found on the data side.
- BHB42631 (noPIC): Another “noPIC” variation, often paired with specific control board firmware.
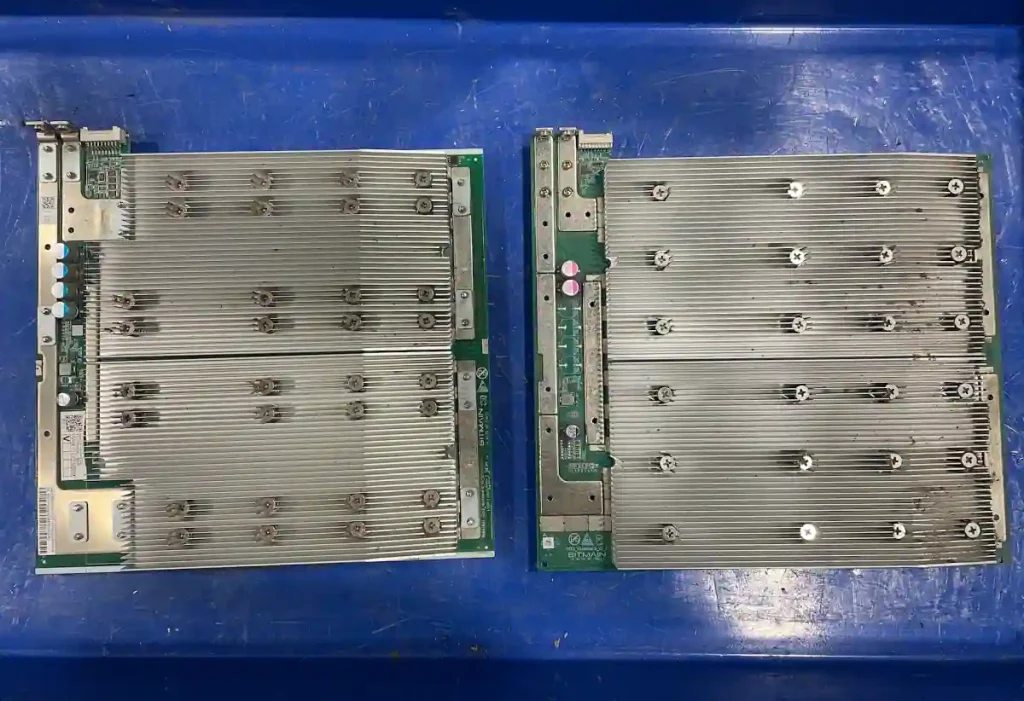
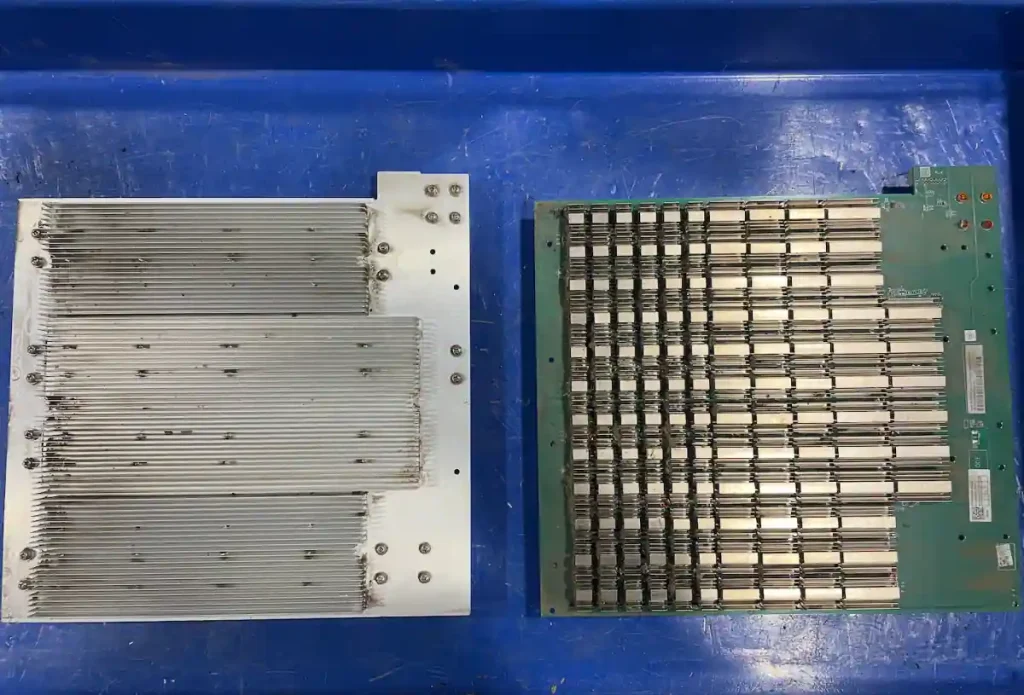
Physical Build: Regular vs. Aluminum Heatsinks
One of the most critical differences to watch for is the material and size of the heatsinks.
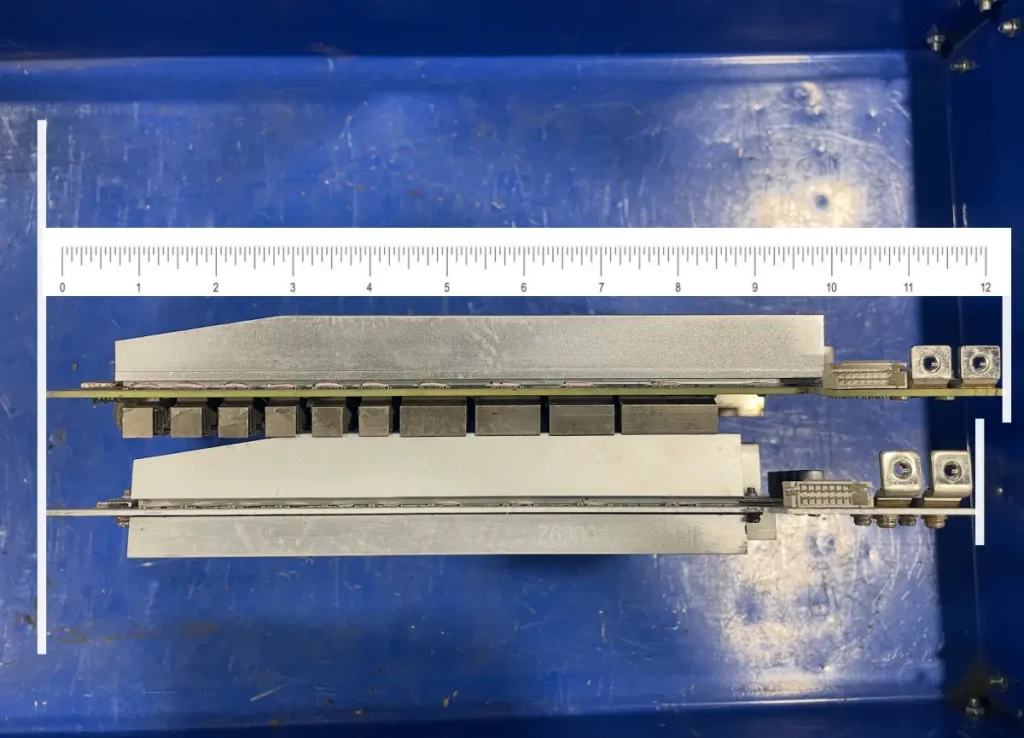
- Aluminum Heatsink Boards: These boards use a single-piece extruded aluminum plate on the back for enhanced cooling. However, these boards are often slightly longer than the standard copper/bolted versions.
- Shell Fitment Issues: If you are consolidating miners (taking boards from different units to make one working machine), the aluminum boards may not fit into the internal slots of a standard S19j Pro shell. Always measure the board length before attempting to swap boards between different batch types.
- Visual Similarity: While the front side of the hashboards may appear identical, always check the model number printed on the PCB and the backside heatsink style to confirm compatibility.
Tech Tip: If you are repairing a “noPIC” board (BHB42603/BHB42631), ensure your control board firmware supports noPIC operation. Standard firmware may not recognize these boards, leading to a “missing chips” or “EEPROM error” log.
Miner Shell: Why Some Hashboards Won’t Fit
At first glance, the external aluminum shell (body) of every Antminer S19j Pro looks identical. However, if you are swapping hashboards between different units, you may encounter a frustrating problem: the board simply won’t slide all the way in. This fitment issue is specifically related to the internal design of the fan supports and the length of the hashboards.
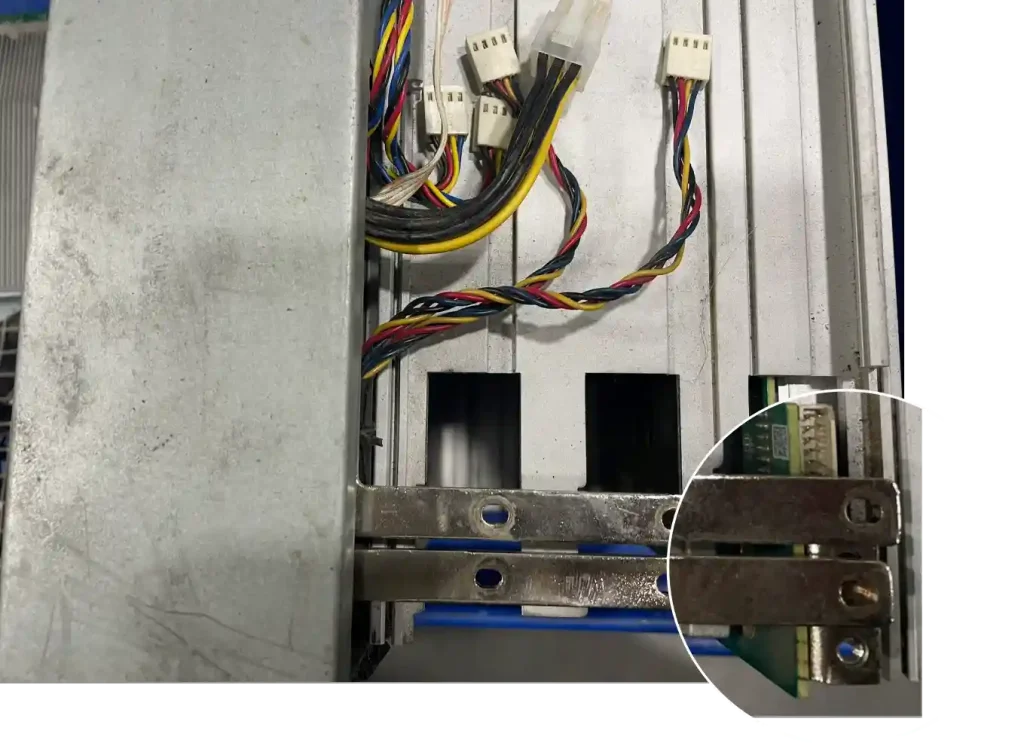
The Difference in Internal Support Brackets
The main reason for this incompatibility is the front intake fan supporter (bracket) located inside the shell. Bitmain manufactured two different types of middle supports:
- The “Long” Supporter: Designed for standard hashboards. Because the support bracket is thicker/longer, there is less physical space inside the shell for the hashboard.
- The “Short” Supporter: Designed specifically for Aluminum Heatsink hashboards. This bracket is thinner, providing the extra millimeters of clearance needed for the longer aluminum boards.

Compatibility Rule for Consolidation
- Standard Hashboards: These will generally fit into any shell, whether it has the long or short supporter.
- Aluminum Heatsink Hashboards: These are slightly longer due to the cooling plate design. They MUST be installed in a shell with the Short Supporter. If you try to force them into a shell with the long supporter, the board will hit the bracket before it is fully seated, preventing the top cover from closing or the fan from being mounted.
The Copper Busbar Alignment Issue
The most critical reason to match the correct board with the correct shell is the Power Busbar alignment.
- Standard Hashboards: These fit into almost any shell.
- Aluminum Heatsink Hashboards: These are slightly longer than regular boards. If you attempt to install an aluminum heatsink board into a shell with a Long Supporter, the board will not slide in far enough.
As a result, the screw holes on the power copper bars will not align with the hashboard terminals. You will find it impossible to bolt down the busbars, making it impossible to provide power to the board safely.
Important Checklist: As shown in the image below, always compare the depth of the middle supporter. You must match Aluminum Heatsink boards with the Short Supporter shell; otherwise, the power terminal screw holes will be offset, and you won’t be able to complete the assembly.
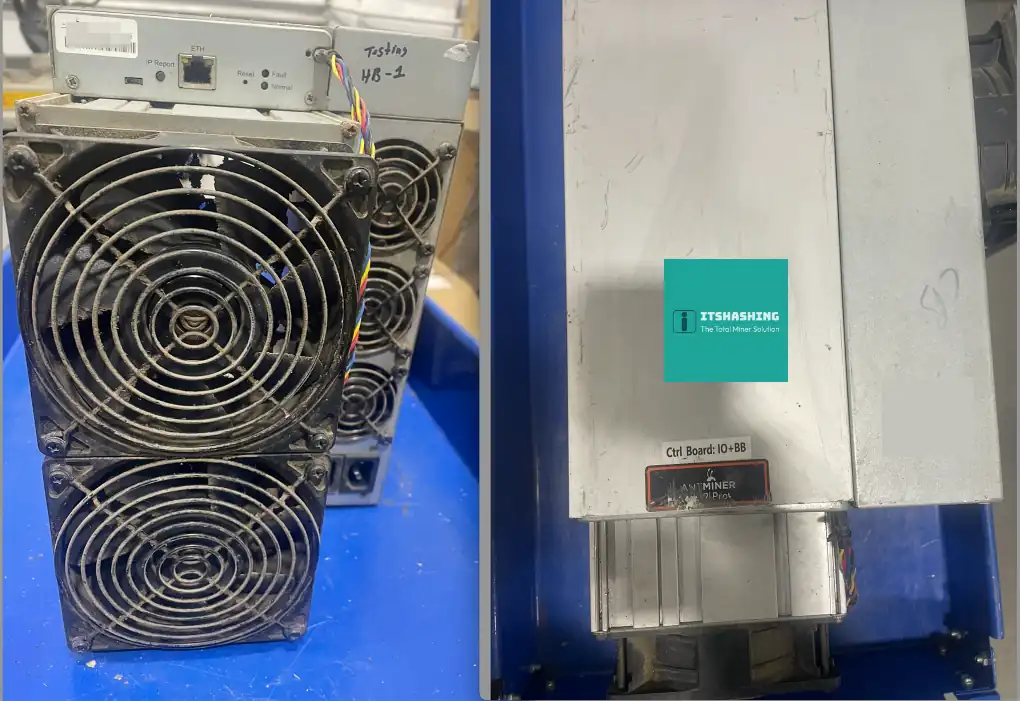
Hashboard Maintenance: Cleaning for Better Airflow and Longevity
The Antminer S19j Pro remains one of the most popular models in the industry. However, since many of these units have been running for several years, they require proactive maintenance to stay operational. While some boards eventually fail due to chip degradation, many issues can be prevented simply by improving airflow.
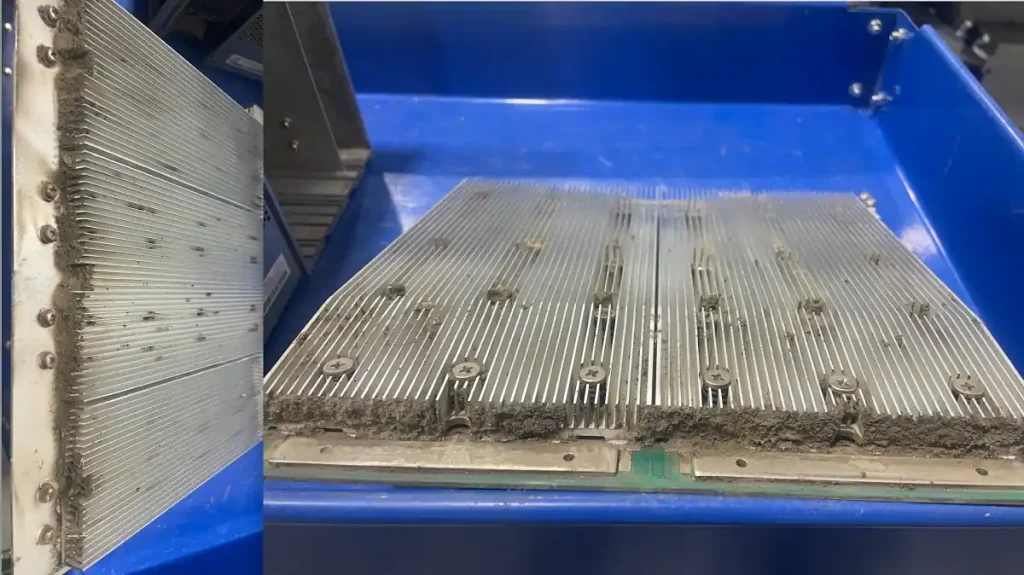
The Hidden Danger: Dust, Bugs, and Clogged Heatsinks
Even if your miner has been running in a relatively clean environment, years of continuous operation inevitably pull in a massive amount of debris. Over time, dust, debris, and even small insects get trapped between the cooling fins of the hashboard and the fan guards.
When the airflow is blocked:
- Reduced Cooling Efficiency: The fans cannot pull enough air through the heatsinks to dissipate heat effectively.
- Higher Chip Temperatures: ASIC chips begin to operate at much higher temperatures than they were designed for (85°C or higher).
- Chip Failure: Prolonged exposure to excessive heat weakens the solder joints and internal components of the chips, eventually leading to “Missing Chips” or “Chain NG” errors.
Why Deep Cleaning is Essential for Older S19j Pro Units
Regularly cleaning your hashboards and fans is the most cost-effective way to extend your miner’s lifespan. By clearing out the airflow paths, you ensure that the heat exchange process remains efficient, allowing the chips to run at their optimal (lower) temperatures.
- Better Performance: Boards with clean airflow maintain stable hashrates and are less likely to throttle due to thermal protection.
- Avoid Costly Repairs: A simple cleaning routine can save you from a $120+ repair bill for a burnt hashboard or replaced ASIC chips.
- Fan Longevity: Clean fan blades are balanced and put less strain on the fan motor, reducing the frequency of fan replacements.
Tech Tip: When cleaning the hashboard, use compressed air or a soft anti-static brush. If the dust is stubborn or “sticky” due to humidity, a specialized ultrasonic cleaner or electronic-safe isopropyl alcohol may be required to restore the heatsink’s thermal performance.
Antminer S19j Pro EEPROM Data Error
As we discussed earlier, the S19j Pro has several hashboard variations. Sometimes, boards that look identical physically will still fail to work together due to firmware or data mismatches. In this case, we encountered a specific EEPROM data error on a board that appeared to be the correct model.
The initial test
2000-01-01 00:00:16 chain num = 3
2000-01-01 00:00:16 load chain 0 eeprom data
2000-01-01 00:00:17 FW type BHB42601, eeprom[0] shows BHB42631
2000-01-01 00:00:17 load chain 1 eeprom data
2000-01-01 00:00:17 FW type BHB42601, eeprom[1] shows BHB42631
2000-01-01 00:00:18 load chain 2 eeprom data
2000-01-01 00:00:18 FW type BHB42601, eeprom[2] shows BHB56801


swapped the positions of Hashboard 2 and Hashboard 3
2000-01-01 00:00:16 FW type BHB42601, eeprom[0] shows BHB4263
2000-01-01 00:00:17 load chain 1 eeprom data
2000-01-01 00:00:17 FW type BHB42601, eeprom[1] shows BHB56801
2000-01-01 00:00:18 load chain 2 eeprom data
2000-01-01 00:00:18 FW type BHB42601, eeprom[2] shows BHB42631
Step 1: Identifying the Error in the Logs
During the initial test, the miner log showed an EEPROM error on Chain 2 (Hashboard 3). To confirm whether the issue was a physical fault on the hashboard or a communication issue with the slot/control board, I performed a swap test.
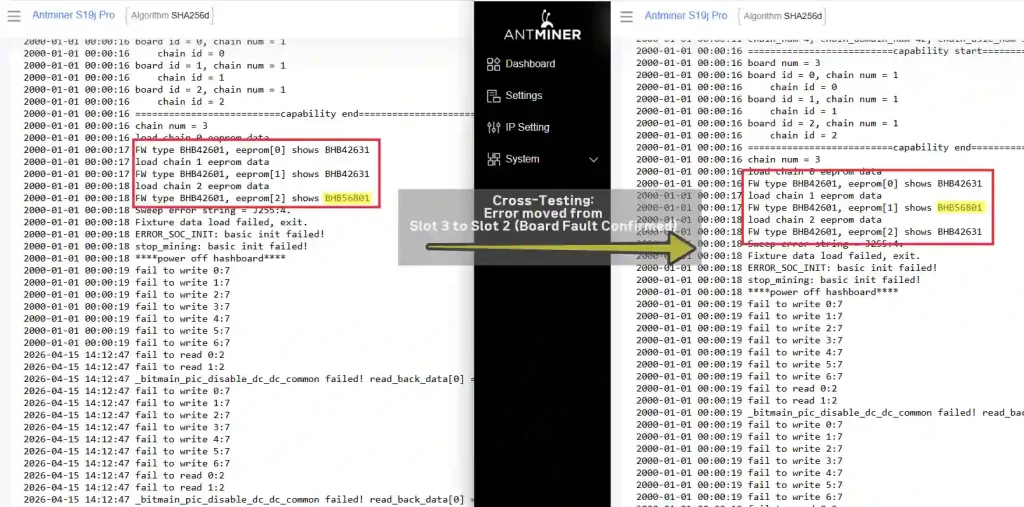
Step 2: Cross-Testing to Isolate the Issue
I swapped the positions of Hashboard 2 and Hashboard 3 and ran the miner again.
- The Result: The EEPROM error moved from Slot 3 to Slot 2.
- The Conclusion: This confirmed that the control board and cables were fine—the problem was definitely the data stored on that specific hashboard’s EEPROM chip.
Step 3: The Fix – Updating the EEPROM
Instead of replacing hardware, I used an EEPROM programmer to update (re-flash) the correct data to the chip. After the update was complete, I reinstalled the board and ran the test once more.
The Result: The error disappeared, all boards were recognized correctly, and the miner began hashing at full capacity.
Tech Tip: EEPROM errors often happen when a hashboard from a different batch or a different power spec is mixed into a new machine. Before you assume the ASIC chips are dead, always try reflashing the EEPROM—it’s a quick fix that can save a “dead” board.
Updating the data resolved the mismatch immediately. If you are unfamiliar with the flashing process, you can check our detailed guide on [How to Use an EEPROM Programmer for ASIC Repair] to get started and see which tools we recommend.